How to Make a WordPress Website in 2022? – Step by Step Guide
Everyone who is having knowledge of the digital platform has a desire to make, design, promote and earn from a website online. For those who are willing to create a wordpress website, here is an ultimate guide on how to make a website in a simple way with step by step guide.
Here in this article, you’ll learn how to make a website without a code. This will benefit to all age groups including students. Let’s begin with an overview from start to finish of the steps which we discuss in making a website:
- How to find a Domain Name &
- How to Register a Domain Name for Free
- How to choose a Best and Cheap Web Hosting
- How to Install and configure WordPress
- Install and Apply a WordPress Theme to change the default design/theme
- How to Create Pages & Posts in WordPress
- Customization of WordPress using Addons and Plugins
- How to design a website with more advanced features
Table of Contents
How to Create a WordPress Website?
Step 1: Setup
For most users, a self-hosted WordPress.org site is the perfect solution. Self-hosted WordPress.org bundles with thousands of designs and plugins which allows you to create any kind of website to turn your ideas into this platform. WordPress is free and it is still growing and provides a full of features with no restrictions.
Another, you can purchase a Domain Name of your own and Hosting.
Now, the choice is yours. Whether you create a wordpress website using wordpress.org or else you can purchase your own domain with the hosting providers.
Let’s proceed to buy a Domain Name and Hosting. You can now purchase a domain name and hosting with your desired hosting provider like
- GoDaddy
- Bluehost
- A2Hosting
- Hostinger
- Hostgator
- Bigrock and more
We recommend Bluehost. As it gives you a lot of features with its best.
Here is the link.
Log in to your selected hosting provider and purchase the domain name and hosting as per the plans.
One thing keeps in mind is that you have to be choosy while taking a domain name, which should be catchy & better if it is a .com extension, and makes sure that is related to your niche or business, and easy to spell and pronounce, simple & easy to remember.
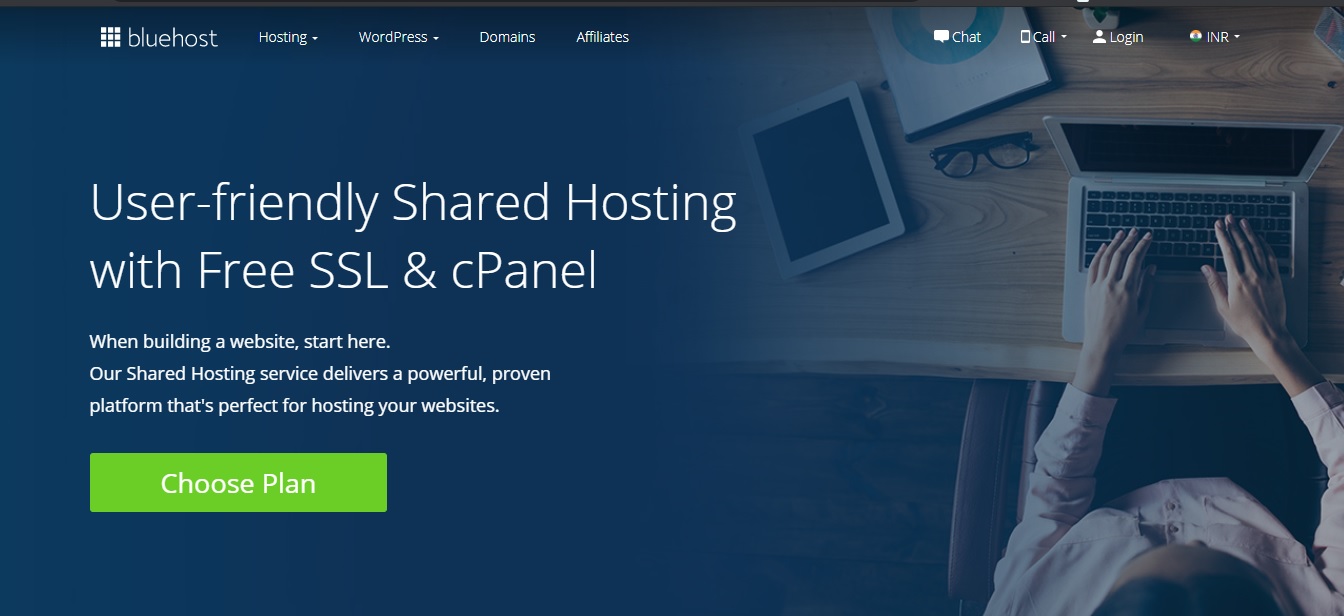
Also, select hosting as cPanel hosting & choose for plans. In between these steps, you will be asked to choose the plans which you are preferred.
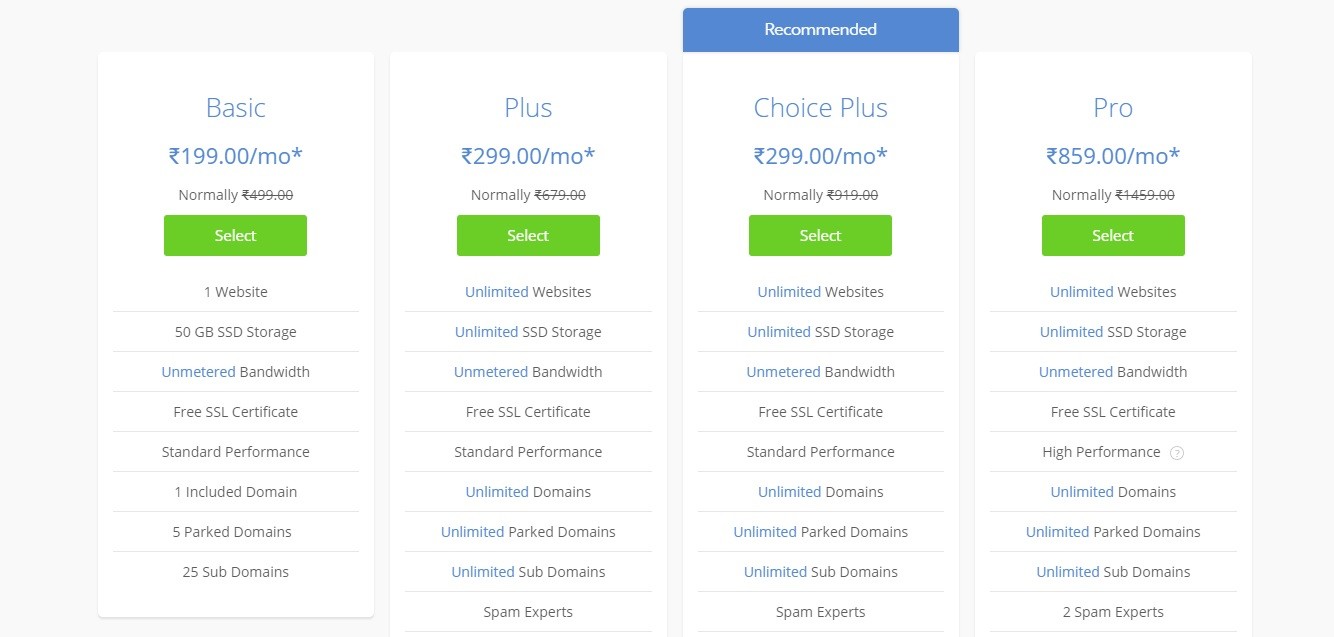
Select as per your business you’re thinking of. These plans could be for 3 months, 6 months, 12 months, 24 months, and 36 months both for the domain name and hosting plans. You can select any of your recommendations.
After purchasing the domain name and hosting(cPanel) you have to go to the next step which is, Installing WordPress.
Step 2: Installing WordPress
Login to the cPanel and you will find the number of applications that you can install on your server as a platform that is used to manage the website and data. Most people use WordPress only.
In the World, about 80% of the websites are using WordPress. Because it is simple and easy as it has built-in plugins, themes, and more features without going deep to the coding.
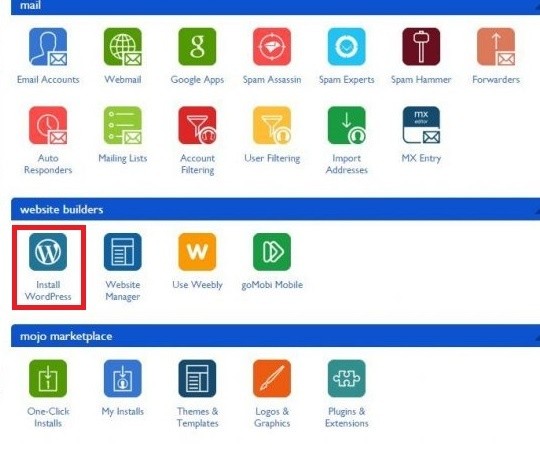
In Applications,
- Find the Install WordPress and click on Install WordPress.
- Click on Get Started, >> select the domain name which you are going to install the WordPress

- Now, you’ll have to enter the website name, admin username, and password for your website. (you can also change these in WordPress settings later also) >> Next.
- Then, you’ll see the Installation Complete message.
Congratulations! You have created your first WordPress website.

Now login to your domain name’s WordPress Dashboard(don’t panic, you’ll get the process to build the website)
www.yourdomainname.com/wp-admin
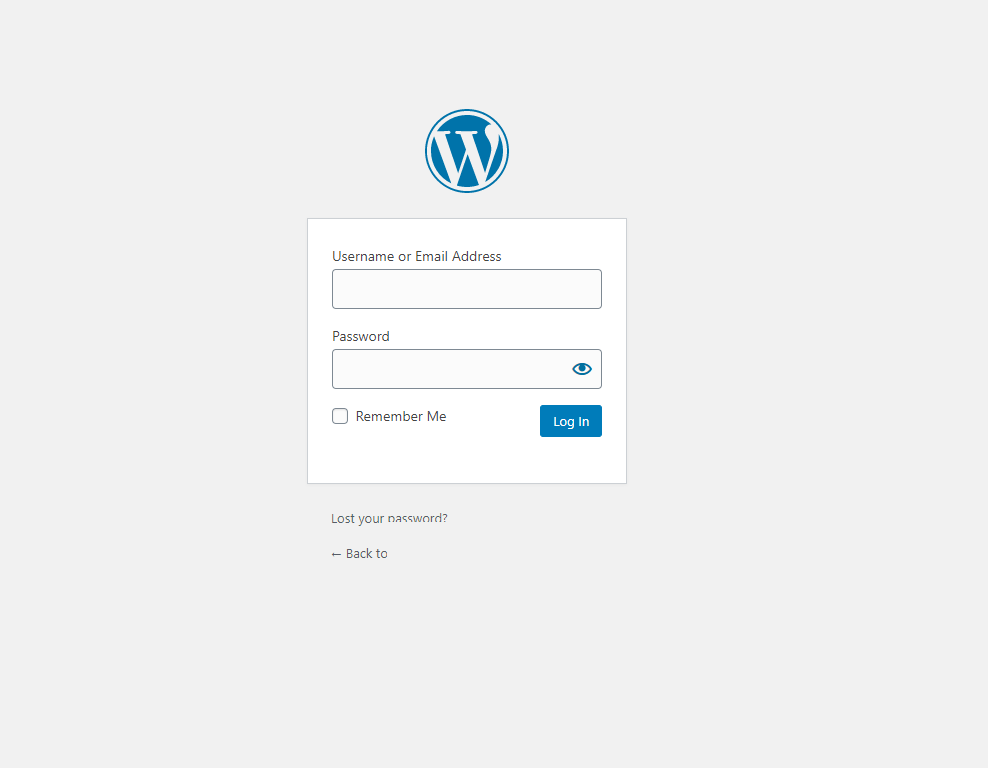
You can log in to the WP dashboard by entering the details you have set earlier.
Step 3: Choose a Theme / Design
Oh, yay. You came to the designing part of the website. This step will be more interesting than the other steps.
One thing you know is that the visual appearance of your website is managed by the WordPress theme. These themes are known to be professionally designed which you can install on your domain name to change the look too posh.
You can go to Appearance >> Themes
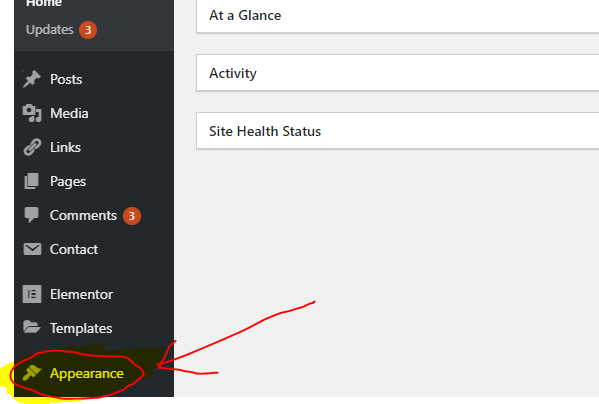
As any WordPress platform has a default theme, which is set as a basic theme. You can change the theme to your desired one and install it.
If you want to install a new theme instead of a basic theme, you can click on Add New on Themes page. You can choose anyone from the library. This library consists of a lot of themes that you can install free of cost which is also available on wordpress.org.
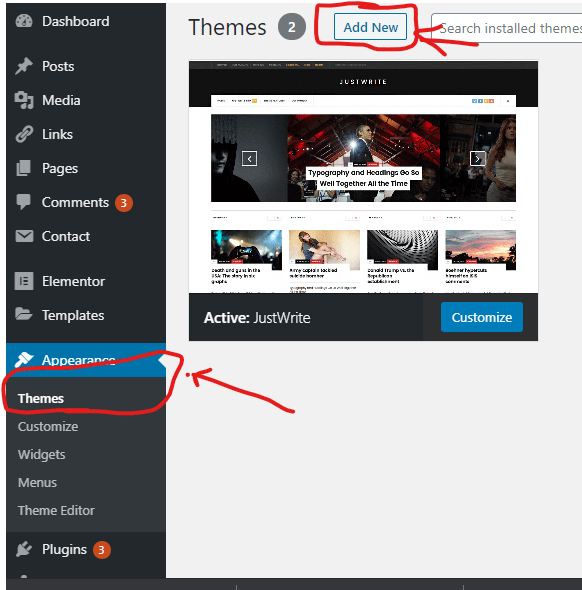
Select the Theme and click on Install.
Next, you can customize the theme with the theme options given by the Installed theme.
It is not recommended to set all the options at once, it will be easier and more efficient to set the options when you have more posts on your website.
Step 4: How to Add Content to your website?
In WordPress, you will have kinds of content types.
- Posts
- Pages
By using posts you can publish daily new content, using various sets of features like images, video, embedded content, and more in both content types.
Let’s have a look at how to create a Page on WordPress:
Go to All pages >> Add New

(You can set a page as the homepage of your website)
You can add a Page title and add some content on the body of your page that is, on the visual editor of the post.
Same for Post creation.
Go to All Posts >> Add New
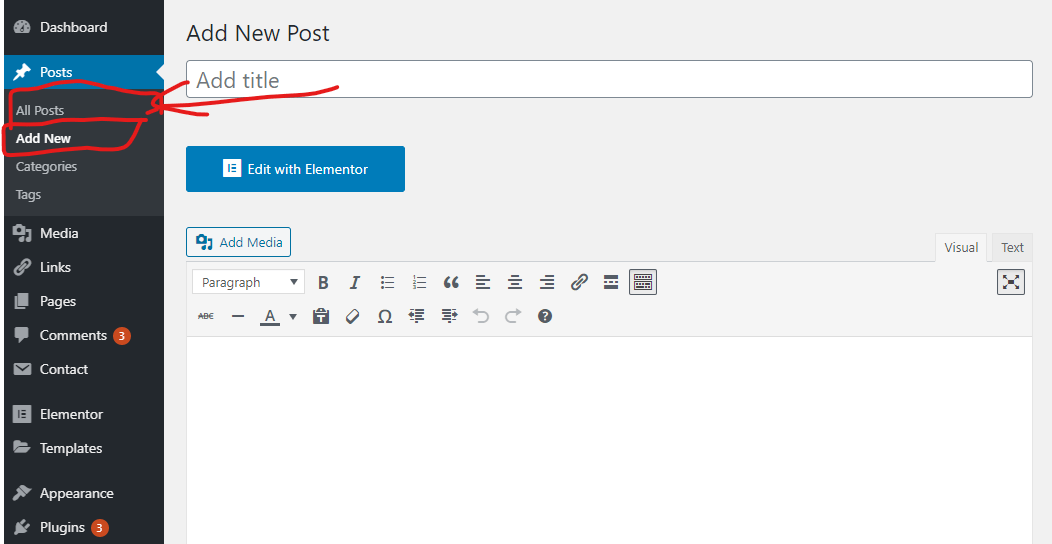
You can add a post title and add some content on the body of your page that is, on the visual editor of the post. Also see some extra options like post formats(image, video, general), tags, and categories.
Step 5: Customizing and modifying your website
Now that you’ve created some content on your website, you’ll be able to customize and position everything on your website in a nice attractive form.
Let’s begin by setting up a Page: STATIC FRONT PAGE.
Go to the Settings » Reading page in your WordPress administration area.
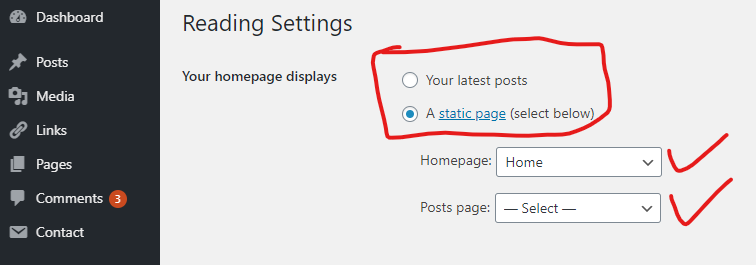
Click o under the link ‘Homepage Displays‘ or front page displays’ Click on the pages you’ve created to set as homepage and save the changes.
You have two options to use:
- Front Page
- Blog Page
Home is used to display the applied page as the front page of your website, and Blog is used for displaying the posts which you’ve written blog posts. These posts will display automatically on your Blog Posts page.
WordPress will now use the page which you titled ‘Home’ as the website’s front page and ‘Blog’ for your blog posts display.
CHANGE SITE TITLE AND TAGLINE
By default, the website name will be ‘demo website’ or ‘Hello world’. You have a chance to change the title and tagline of your website.
Go to Settings >> General
There you can find Site Title and Tagline.

Change the fields as you desired.
Create and Manage Navigation & Main Menu
You can create and manage the menu’s for your website simply by going to Appearance >> Menus.
You can now add pages and posts whichever you want to add, after adding the pages and posts check under the menu settings(you can find these below) Primary Menu or Footer Menu or something and click on the save menu.


Now you’ve added the Navigation menus to your website.
Next, you’ll learn how to install plugins and activate them and what are the most popular and most essential plugins are needed for your website.
[ Also check: Best ways to make your password stronger and safe ]
Step 6: Install Plugins
Let’s talk about how to install the plugins on the WordPress site.
Plugins are the additional apps for your WordPress website. These will allow you to add additional features to the site.
In WordPress, there are around 50k free plugins are available to install and activate and enjoy the features.
Now, you will be having a doubt that within these number of plugins, how to know and install the efficient plugins. Here is the answer to that. We bring you a list of plugins which is needed for your website.
For Optimization, Cache:
- WP-Optimize
- Jetpack
For SEO:
- Yoast or Rankmath
For Pagebuilder:
- Elementor(Free+Paid) or Visual Composer(Paid)
For Security:
- Updraftplus
- Secure or Wordfense
These are the steps to making a website using WordPress.
Please feel free to ask questions in the comment box below.

